Showing posts with label before and after. Show all posts

Wednesday, April 18, 2012

A Fresh Reno.

For the last while, I've been doing some in-home consultations, which I am quite enjoying. The best part about it is when a client keeps me in the loop of their progress. I absolutely love getting emails with photos of new paint colors, flooring or even a new accessory they've found that works perfectly in the space.

The project I'm sharing with you today has been a fun one for me to follow. Kim invited me to her home, hoping for some help freshening up the color scheme. We chatted paint colors, window treatments, lighting, updating the existing kitchen cabinets and the biggest decision of all - taking down some walls! A few weeks later, I got an email from Kim. Taking down the walls was structurally feasible, so they went ahead and got it done! How's that for motivation?

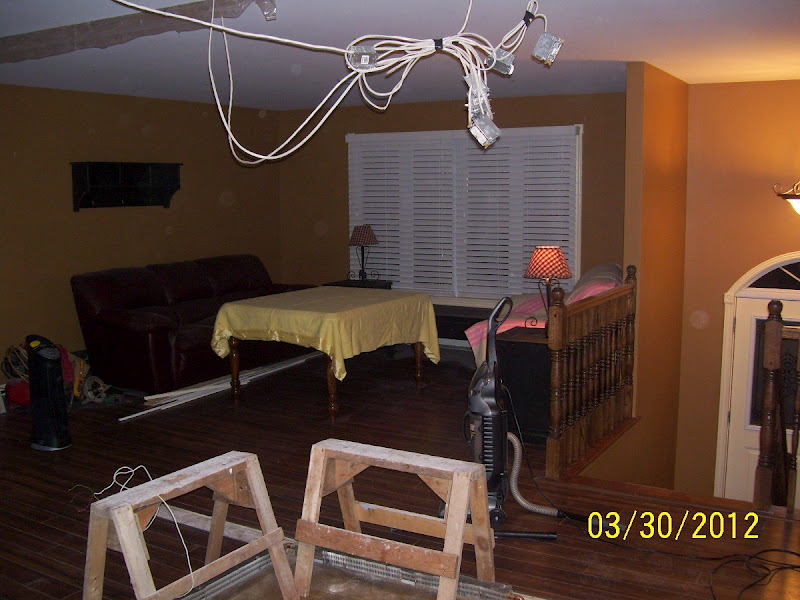
Here are couple of photos of the space prior to the transformation. It was a separate living room, dining room and kitchen.
View of living room from the dining room.

 The wall between the kitchen and living room.
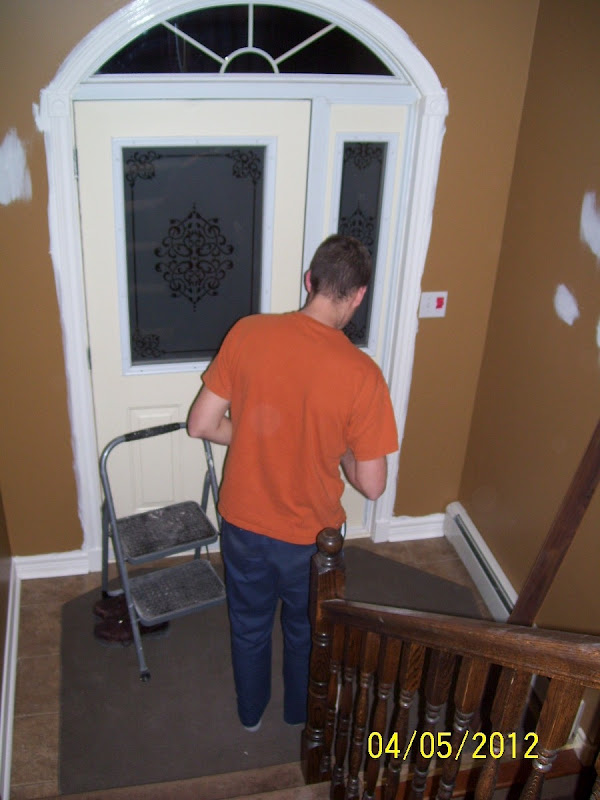
Front entry.

Before I show you the progress and after pictures, I must say that she and her husband are machines! They did all of this in a matter of a few weeks. Sometimes working into the wee hours while their two little ones were fast asleep. I wish I had that kind of energy.. this girl needs her sleep or she is a big bear! :)

Here are some of the progress shots that she sent me along the way. So exciting!


Here it is with new pot lights in the ceiling and a fresh coat of paint (Benjamin Moore ~ Gray Owl). Looking like completely different space already! I've said it before and I've said it again.. there is nothing like the power of paint!


Are here is how it's looking now. Quite the transformation, if you ask me!

New light and fresh paint in the entry.

They were able to match the flooring and carried it through the whole space. The kitchen cabinets were painted a crisp white and the knobs were replaced with silver pulls on both the drawers and doors.

Next up is a large island between the kitchen and dining room, a light fixture over the table and some window treatments. Personally, I think they should just sit, put their feet and enjoy all their hard work! They certainly deserve it!

Thanks for letting me share today Kim! I was so happy to have helped out, even just a little bit!

Sunday, May 15, 2011

Three Years.


I am terrible for missing important dates. I missed my blog's first birthday (sorry little blog) and I almost missed my house's birthday too! I just realized tonight that I have owned my home for 3 years today! It's come a long way and there are more projects to come.

I promise you, dear little home, that your front porch will get a face-lift this summer. It's looking a little tired and I'll get to it, I swear! :)

Here are some fun before shots.


I think the kitchen is the most dramatic change but refinishing the floors and installing new windows are also changes I appreciate! Check out the house tour tab to see how far my little home has come!

Thursday, January 27, 2011

Revisiting the Cabinet

A little white ago, I found this cabinet for the dining room.


I gave it a little makeover with a little white paint. (I really believe a little white paint can transform anything from blah to beautiful!)


I threw around the idea of painting the inside of the cabinet another color, and it seemed that my readers agreed with me. A little visit to the basement revealed a multitude of color choices, left over from other projects.
Hiding at the back, I found a can of a pretty blue grey. What from? Then I remembered... the porch cabinet was once painted that color. If only for a few days until I ditched it in favor of black... and then of course white. When will I learn that while I try to be "fun", I am a white girl at heart!
Anyway, it's a pretty color and I think it looks good in the cabinet.

before:


after:


What do you think? I only painted the back and not the whole inside. I figured it I liked the result I could go back and paint the rest. Let's be honest though, I'm not super great at getting back to things..:)

Also, a big thanks to these lovely bloggers who featured me this week on their blogs!


Sunday, January 23, 2011

The Dining Room ~ A Picture Walk

The dining room in my home is a good space, in that it has nice windows so it gets a lot of light. It was one of the first rooms I tackled when renovating. The floors were refinished, walls and trim painted, new windows installed and wallpaper applied to one wall.
While the wallpaper is beautiful, I don't really feel it reflects my style anymore. I was so confident that I knew what my style was, then over time it changed. Or should I say evolved... I know now what I like and what I don't like and more importantly what fits into my home.
In the end sometimes you have to live with your mistakes! The wallpaper was not cheap, therefore is not coming down anytime soon. So that means I have to work with it.
It is not my favorite room in the house, but I like it all the same.

Here is the room before:

I spot Daddy Clem doing a little measuring ;)

Here it is with new paint and wallpaper.


And here it is now.. a work in progress. While mostly finished, the table is on loan from my dad (it's quite beautiful) and I really want/need new chairs. Something a little more modern, perhaps?


Resource list:

Wall paint: BM Wheeling Neutral in matte finish
Trim paint: ICI Natural White in semi-gloss finish
Light fixture: sears.com
Cabinet: painted by me
Mirror and Lamps: Winners
Curtains: Fabricville with an added bottom panel.. thanks aunt Marilyn:)

To do list:
  • replace chairs
  • paint back of cabinet (blue?)
  • new mirror
  • find or create a good centerpiece
  • Just dreaming, but a banquette under the window...
I would love to know what you think? Any suggestions for chairs, mirrors or centerpieces?

Thursday, December 2, 2010

Fresh & Bright Porch

Well, the back porch is finally finished. I have to say, I really love it. It feels so bright and clean. Now, if only it stays that way! It tends to be a bit of a drop zone.
The redo started out with painting out the black built-in cabinet white. I shared that here.


Then, Steph built a bench and we made an upholstered cushion for it.


The walls were originally blue, same as the kitchen. I painted them all white with white trim. I really wanted white, but then was unsure when I finished painting. It seemed a little sterile. But now that all the accessories are in the room, I love it.
There were hooks on the wall but my sister and I installed them last summer and they didn't exactly hold up very well.. apparently we stripped all the screws? I'm not so great with a drill and obviously neither is she!


Anyway, we added a bit of trim and a shelf, painted it white and Steph installed the hooks properly.


Here is the room all finished! Just in time for the house tour! Also, a glimpse of the West Elm Globe Pendant that I ordered!


I'll post pictures next week of the room decorated for Christmas, along with the rest of the house!

Thursday, November 25, 2010

No-Sew Roman Shades

I wish I could, because it is so great, but I can't take credit for this project idea. Jenny at Little Green Notebook shared this tutorial a while ago on how to make roman shades out of mini blinds, fabric and a little fabric glue. For a girl who can't sew, this project was right up my alley!
At first I was skeptical, until I saw how many people commented on her post with their success stories. I decided to try one out myself.
I made one for my office first. (sorry no pic) It has held up well and no one has suspected that it wasn't sewn.. or at least they haven't told me so!
So, I gave it another go in a bedroom and it turned out great again. I love the finished product.


So, for those of you who were wondering what I had up my sleeve for my favorite fabric from Premier Fabrics, there it is! The bedroom has two windows in it and I used just over a metre for both.
The room finally feels complete. Here is a photo is the room before the shades.


It is kind of an awkward room to photograph because it is an L shade with an alcove. Here is a couple of shots of both windows with the new shades.


Please excuse the old rad, my wrinkly bed and dirty windows! You don't notice these things so much until you take pictures!
Just for fun, here is a picture of the bedroom before paint and wallpaper.


This was an emotional moment for me when we discovered what was under that paper :(
It all turned out okay in the end though!

This project is seriously so easy! Find a window in your home that needs some love and make one! You will thank me.. I mean Jenny:)

Sunday, November 21, 2010

Painted Cabinet

I finally finished painting the cabinet in the dining room. I decided to go with white, since I am still trying to lighten up the space. I just love white paint. I swear, if I have a can of white paint, I'll paint anything that is standing still :)
Here it is before paint:


And here it is finished:


I didn't fill the holes on the drawers before I painted, assuming I could just find new pulls to replace the old ones. Unfortunately, the holes were not standard distance apart, so replacing them was proving difficult. I really didn't want to go back and fill the holes and redo the drawers. I was done with the cabinet at that point - on to other things!
So instead, I primed the old pulls and painted them the same color as the cabinet. I was hesitant, but I'm really happy with how they turned out. For two reasons:
#1 -  They blend into the cabinet. I had been thinking silver or chrome handles, but it may have looked a little busy.
And # 2- It saved me money!
Here is one more with the wallpaper in the room.


I'm so glad to have it finished. One more thing off the to-do list!

Thursday, November 18, 2010

My "New" Chair!

I'm so excited! After purchasing an old chair last year, I finally sent it to be reupholstered. And today, I got to pick it up!
Isn't it beautiful!


Remember what it looked like before? Who would have ever chose that fabric? Plus, it was in really bad shape. Kinda gross actually.


I poored over fabric websites and visited fabric stores for the last year looking for the perfect fabric. I am a bit fussy, but my problem was more what would work with the room. I have a geometric print wallpaper, so I didn't want another pattern that would complete with it.


Also, the chair had a channel back which wouldn't allow for any pattern that wasn't random, or else it would love uneven.
I finally picked one that worked well with the other patterns and colors in the room.
What do you think?


The fabric is Waverly Sun N Shade Mimosa Mushroom. It's an indoor/outdoor fabric so it should withstand lots of use!


I am contemplating painting the legs white.. not sure. It feels a bit wild to me since the rest of the room is so soft and serene feeling, but I think it provides a punch that the room needed.
What do you think?