Showing posts with label porch. Show all posts

Monday, April 16, 2012

Beaufort's Corner.

What do you do when you spy a white ceramic wall hanging that looks just like your sweet little dog's face? You buy it, of course, and figure out what to do with if later.


This is how Beaufort's corner in the back porch was born. All the metal baskets were on clearance at Superstore, so I snagged one of the wall baskets. It hangs by the door and is perfect for leashes, toys and rags for wiping wet paws.


Such a simple little update but it works for us and it's cute.. which is most important, right? :) Have a great week!


Linking up to Serenity Now.

Monday, April 11, 2011

Mod Dog Shop

I took a little personal time off from blogging and wow! It sure doesn't take long to be out of the loop! I took a quick scan through my reader this morning and saw so many great projects from some of my favorite blog friends. I'm looking forward to finding some time to check them out:)

With spring weather on the horizon, I'm feeling the desire for some color in my home. I saw these adorable silhouette prints from Mod Dog Shop a while back and thought they just may do the trick!

Of course I'd have to get the Boston Terrier in honor of little Beaufort.
But, look how cute the little Frenchie is. Anyone have one?


It think it will add a bit of interest to my ultra white porch.


Now to decide what color...?


I hope you all enjoyed your weekend and that the sun is shining where you are!


Thursday, February 10, 2011

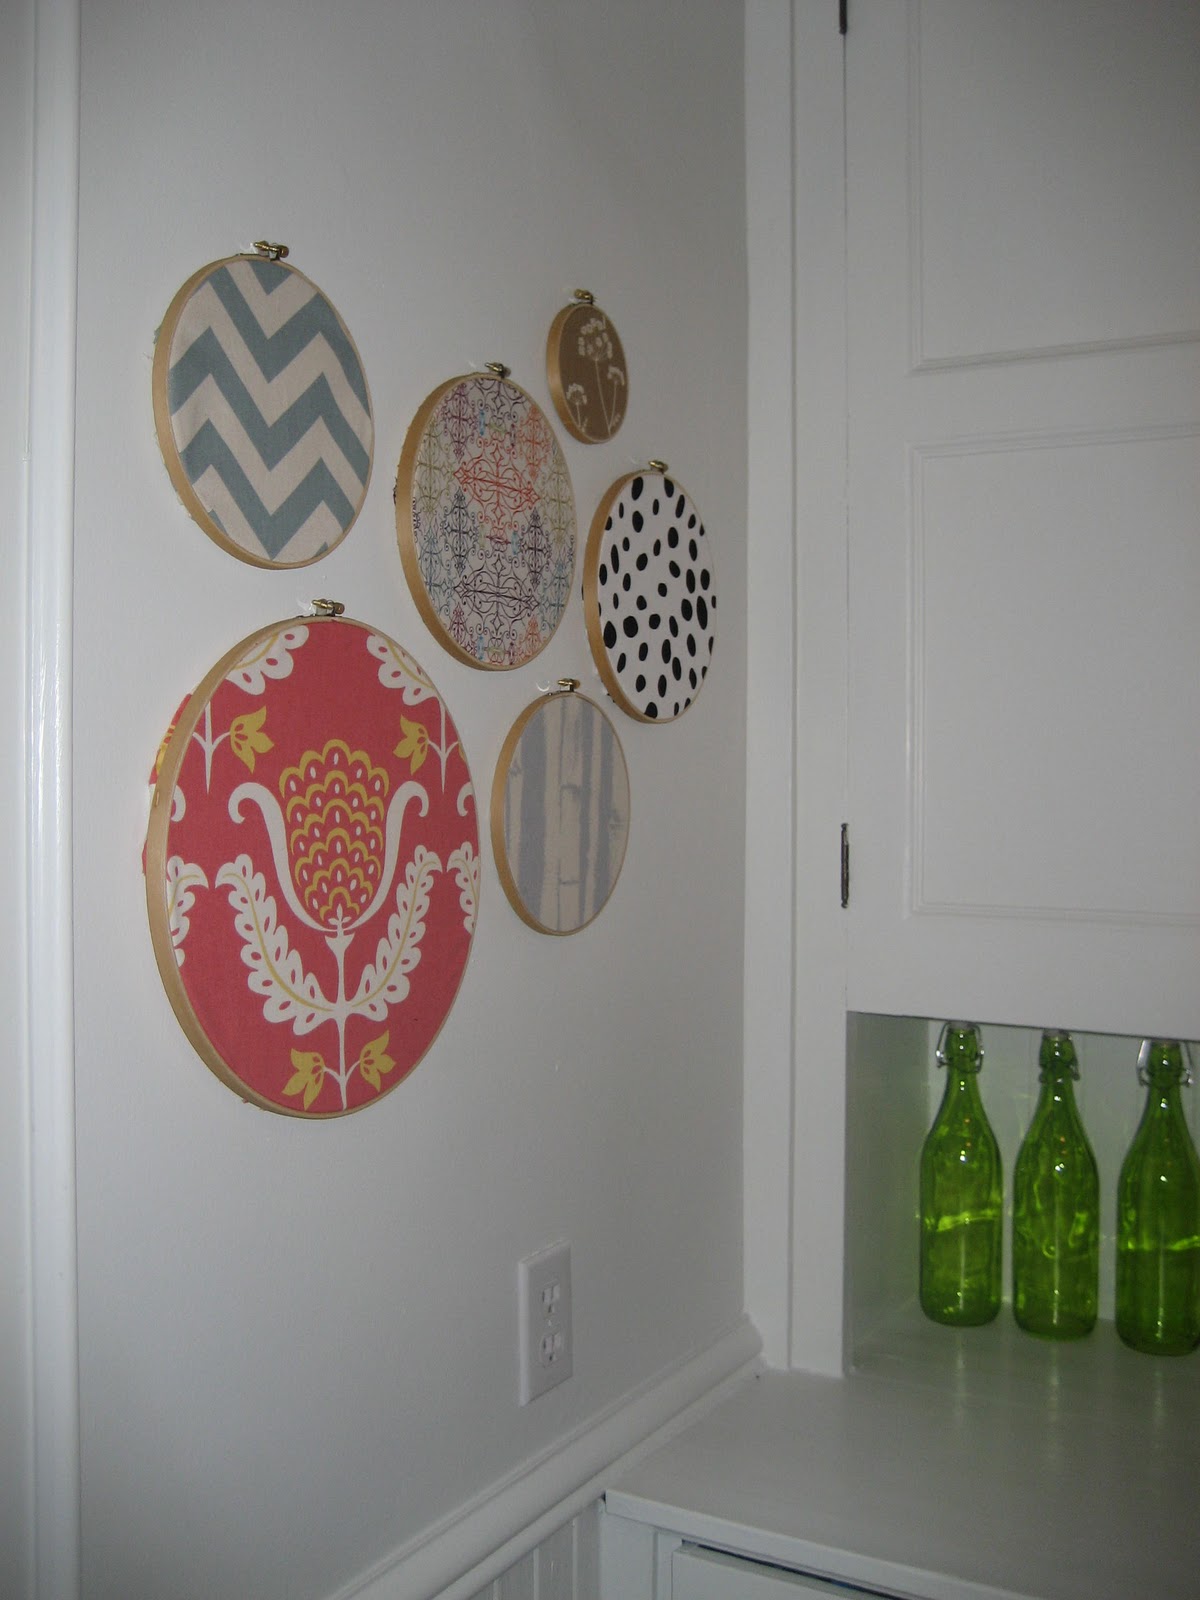
DIY: Refreshed Embroidery Hoops

While I love my all white porch, lately I've been itching for some color. Before I painted it all white, I had embroidery hoops on the wall.

I really don't miss the cabinet painted black!
 After painting the walls white, they were replaced with one of my favorite prints.

Hard to see it here but it's this one from eva juliet's etsy shop.
 I decided to change things up. I put the print back in the living room and now the embroidery hoops are back up in the porch with new fresh and fun fabrics!


I plan to use the big one as a bulletin board. I cut a piece of foam core to fit inside the back.
This way I can stick pins in it.


Now I'm ready for spring! Although it seems forever away!


Thursday, December 2, 2010

Fresh & Bright Porch

Well, the back porch is finally finished. I have to say, I really love it. It feels so bright and clean. Now, if only it stays that way! It tends to be a bit of a drop zone.
The redo started out with painting out the black built-in cabinet white. I shared that here.


Then, Steph built a bench and we made an upholstered cushion for it.


The walls were originally blue, same as the kitchen. I painted them all white with white trim. I really wanted white, but then was unsure when I finished painting. It seemed a little sterile. But now that all the accessories are in the room, I love it.
There were hooks on the wall but my sister and I installed them last summer and they didn't exactly hold up very well.. apparently we stripped all the screws? I'm not so great with a drill and obviously neither is she!


Anyway, we added a bit of trim and a shelf, painted it white and Steph installed the hooks properly.


Here is the room all finished! Just in time for the house tour! Also, a glimpse of the West Elm Globe Pendant that I ordered!


I'll post pictures next week of the room decorated for Christmas, along with the rest of the house!

Monday, November 15, 2010

The $16 Bench

What do you get when you have a handy guy and a $16 sheet of plywood?
A new bench for the porch!

He whipped it up one evening with a sheet of plywood and some leftover trim pieces.


It was a little rough, but with some sanding, silicone, plaster and a couple of coats of primer and paint, it now looks like this!


I added a bench seat. The fabric is Waverly Cross-section from fabric.com:


I was inspired by Megan's mudroom bench seat from Honey We're Home. So, I pretty much just followed her directions!
I attached the foam to a piece of plywood using spray adhesive. Then, we wrapped the plywood and foam with cotton batting and stapled on the fabric.


I'll be honest, the seat cost at least twice what the bench cost. The foam itself was $30, and that was a deal because I scored a leftover piece. Why is foam so expensive?
I already had the black baskets and they fit perfectly in the boxes, hiding the shoes that were piling up at the door.
I guess, all in all, the bench cost about $60 and a little bit of work. I think it's cute and it gives a bit of storage!

So, for the porch makeover, I've checked many things off the list:
  • Repaint cabinet - done!
  • Put in a bench - done!
  • Make seat - done!
  • Replace trim around new door - done!
  • Paint all trim and wainscotting - done!
  • Paint walls - next on the agenda.
I hope to post the finished room soon!

I'm linking over to The Shabby Nest!

Sunday, October 17, 2010

Porch Cabinet Makeover

This weekend the cabinet in the porch got a bit of a makeover.

cabinet on move in day.
It was originally cream when I moved into the house. The finish was so chipped and dirty, it just had to go. It was one of the first projects that I tackled when moving into the house. I decided to paint it a grey-blue. I knew even before the 2nd coat that it just didn't work.

Next, it got a couple of coats of glossy black. It actually looked kinda sharp and I received lots of compliments on it. It's been like that for 2 years now. But in the end, it just wasn't me. It seemed to dark and imposing in the tiny room. I had a picture but unfortunately it got deleted :(
Last week, I got home from work and decided it was time to ditch the black. The cabinet got a coat of primer. I felt instantly better about it.
I also decided to prime the inside of the cabinet, since it had never been done and was the original dark woodwork.
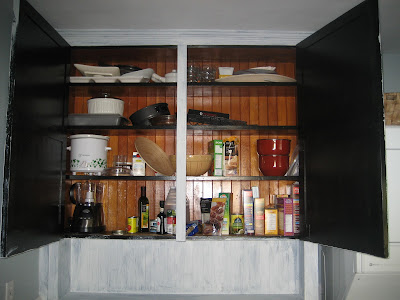
inside before primer
This weekend, I finished painting the whole cabinet, in and out, my favorite glossy white (ICI Natural White). It is like a breath of fresh air. I've said it before - there is nothing a little white paint can't fix- and in this case, I think I'm right. It should have been white from the start!
The hardware is the original. Underneath all that paint were some rustic brass pulls.


Then, I lined the back of each shelf with black and white scrapbook paper.


I thought about using wallpaper but scrapbook paper is inexpensive and easy to work with.
I just attached each sheet with double sided tape in the corners. The patterns don't line up perfectly, like wallpaper would, but with the cabinet full of stuff you will never know!
Here it is full of the kitchen items. I need the bottom right for extra food storage but left it out for the picture... it looked nicer without the rainbow of boxes and cans:)


I really like how it turned out and it will be easy to remove if I get tired of it.

This whole room is getting a makeover so stay tuned for the results!